Instagram is a powerhouse platform for boosting brand awareness, fostering community, and driving conversions. However, maintaining a consistent stream of high-quality, high-converting content can quickly drain your creative resources.
This is where content curation and reposting become essential strategies. While Instagram historically forced users to rely on workarounds, the platform has rolled out powerful native sharing options alongside classic third-party tools.
Whether you want to feature user-generated content (UGC) directly on your feed, amplify an impactful Reel, or share a trending Story, this comprehensive guide covers everything you need to know about reposting on Instagram.

Quick Guide: How to Repost on Instagram (Featured Snippet)
If you are looking for the fastest way to repost content on Instagram, follow these steps:
- To Repost Natively to Feed/Reels: Tap the Paper Plane (Share) icon below the post or Reel, select Repost, add your optional commentary, and confirm to share it directly to your profile’s dedicated Repost tab or main feed.
- To Share to Your Story: Tap the Paper Plane icon on any public post or Reel, and select Add to Story.
- To Use a Third-Party App: Copy the post link, open a dedicated app like Regrann or Reposta, customize the attribution watermark, and export it directly back to Instagram.
- To Repost via Manual Capture: Take a high-resolution screenshot or screen recording, crop the media to remove user interface elements, and upload it as a new post while manually tagging the original creator.
Comparison Table: Instagram Repost Methods
| Method | Speed | Content Quality | Automatic Attribution? | Best Used For |
| 1. Native Repost Button | Instant | Original Quality | Yes (Linked profile) | Quick curation, micro-influencer content, and community building. |
| 2. Share to Stories | Instant | High Quality | Yes (Clickable sticker) | Time-sensitive promotions, daily engagement, and casual updates. |
| 3. Third-Party Apps | Moderate | Original Quality | Yes (Watermark options) | Maintaining a permanent grid aesthetic with explicit visual credit. |
| 4. Screenshot / Recording | Slow | Lowered (Compressed) | No (Manual entry required) | Archiving static images or saving memes when sharing permissions are restricted. |
Method 1: Using Instagram’s Native Repost Feature
Rolled out globally as a core feature, Instagram’s native repost tool allows you to reshare posts and Reels directly to your audience without leaving the app. This feature populates a dedicated ‘Reposts’ tab on your profile grid, similar to how the Reels or Tagged tabs function, and can also push content directly into your followers’ feeds.
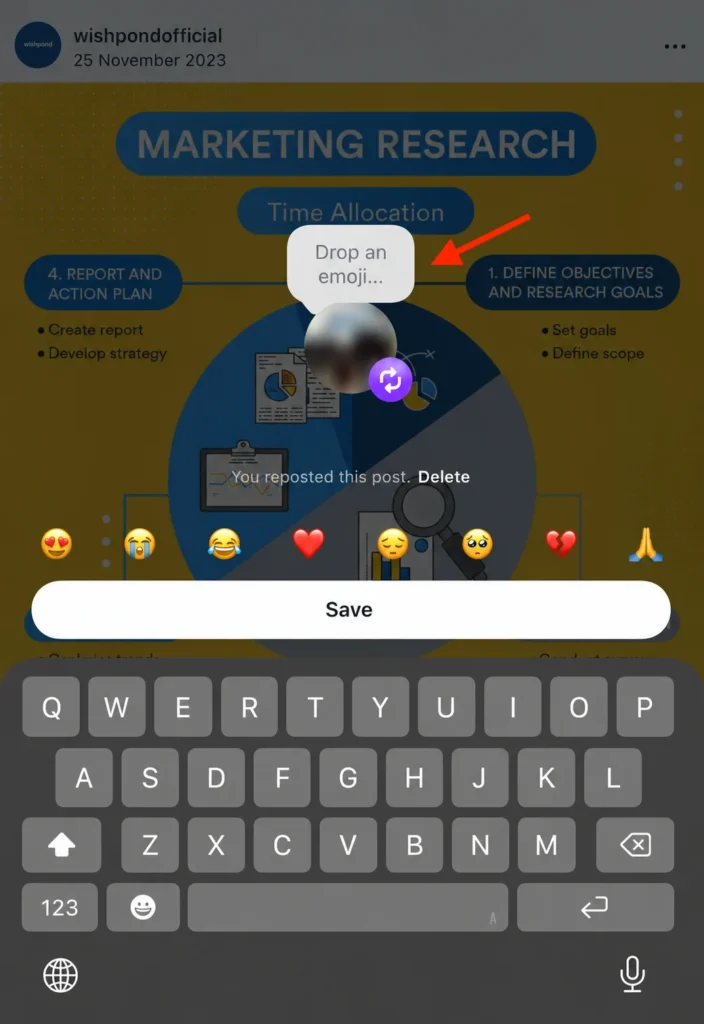
Step 1: Locate the Content and Tap the Repost Button
Find the public post or Reel you want to reshare. Tap the Repost button (indicated by a dual-arrow loop icon) located directly beneath the media asset, right next to the Paper Plane (Share) icon.

Step 2: Add Your Context (Optional)
A pop-up menu will give you the option to Add Thoughts… Type out your commentary, reactions, or brand-aligned copy here. This adds unique context to the curated post when it appears on your followers’ feeds.

Step 3: Confirm and Publish
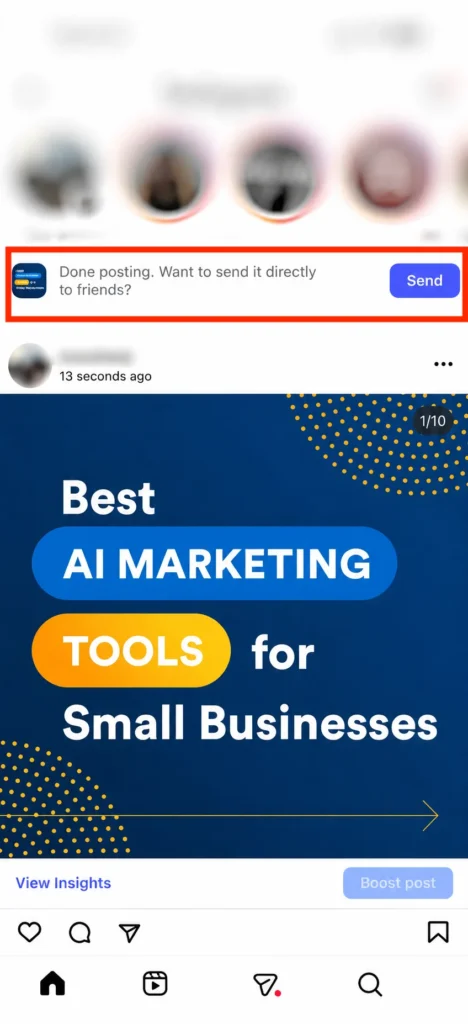
Tap Repost to finalize the action. The original creator will receive a notification that you shared their content, automatically boosting your B2B networking and creator relationship efforts.
Method 2: Sharing Posts & Reels to Instagram Stories
Sharing content to your Stories remains one of the highest-converting methods for driving immediate traffic to a specific post or product launch.
Step 1: Tap the Share Menu
Go to the feed post, carousel, or Reel you wish to share and tap the Paper Plane icon.

Step 2: Select “Add to Story”
Tap the Add to Story button at the bottom left of your sharing panel. This creates a dynamic, interactive preview sticker of the post inside your Story editing interface.

Step 3: Customize the Layout and Tap for Text
Tap directly on the post preview sticker to toggle between different layouts (e.g., showing a clean image preview or showing the image alongside the original creator’s caption snippet). Use the text, sticker, and music tools at the top of the screen to add interactive polls, countdowns, or contextual commentary.
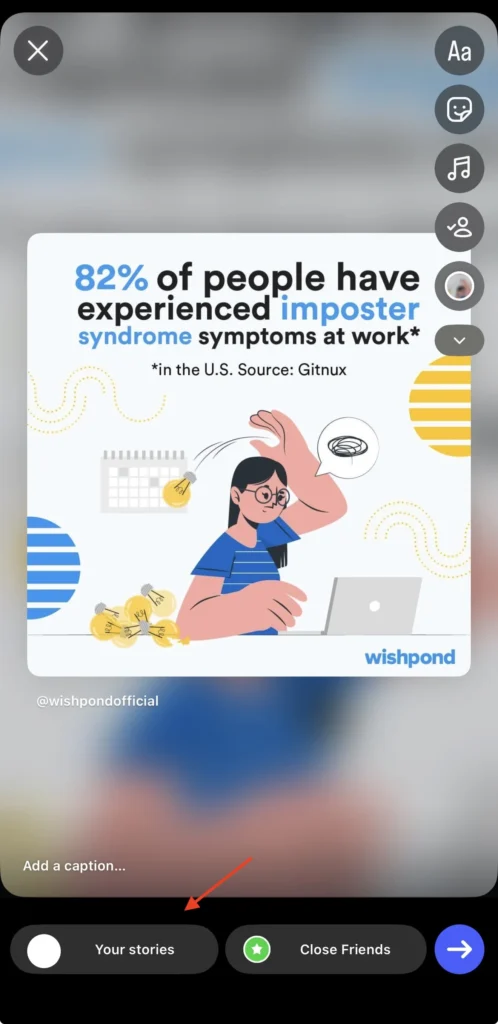
Step 4: Publish to Your Audience
Tap Your Story or Close Friends in the bottom left corner to instantly publish the asset. Your viewers can tap the sticker to go straight to the original, live post.
Method 3: Using Web Downloaders & Mobile Editors (Grid Workarounds)
If you want a curated post to permanently live directly on your primary Instagram profile grid (rather than the dedicated native Reposts tab), or if you need to download raw media assets for advanced content composition, native sharing won’t cut it.
Note: Dedicated “Reposting apps” on iOS and Android frequently break, stop working, or get removed from app stores due to Instagram’s strict security updates. For a reliable, permanent workflow, use the web or manual methods below.
Option A: Web-Based Asset Harvesting (SnapInsta, FastDl, or SaveInsta)
Because web-based downloaders operate outside of mobile app stores, their developers can update them instantly whenever Instagram shifts its code. This makes them the most reliable tool-based alternative for pulling raw, high-resolution media without watermarks.
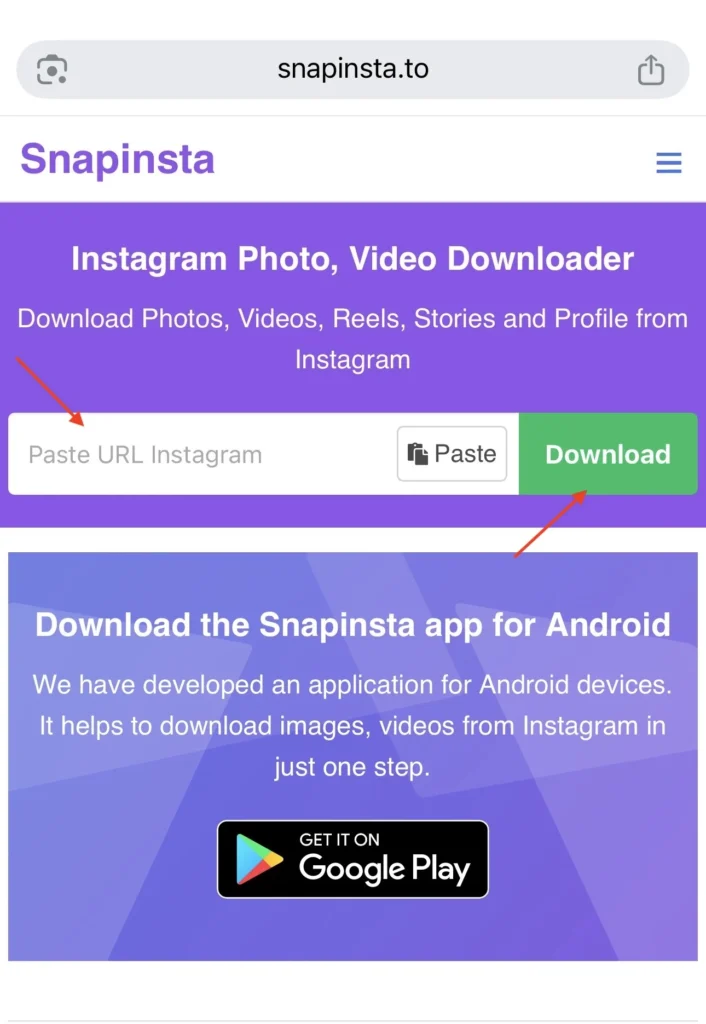
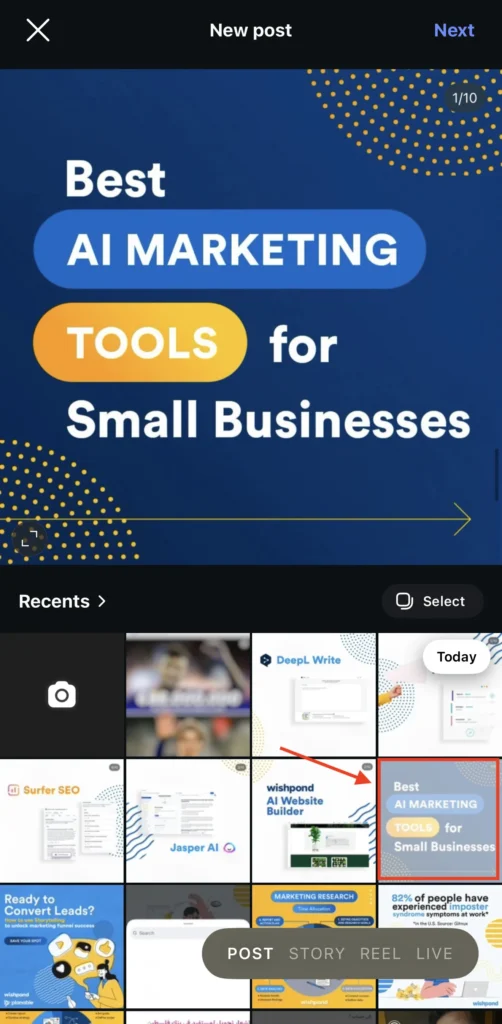
1. Inside Instagram, find your target post or Reel, tap the Share icon (the paper airplane), and select Copy Link.
![]()
2. Open your mobile or desktop browser and navigate to a trusted asset downloading platform like SnapInsta, FastDl, or SaveInsta.
3. Paste the URL into the prominent input field and click Download.
4. Save the asset directly to your device’s camera roll at maximum resolution (1080px).
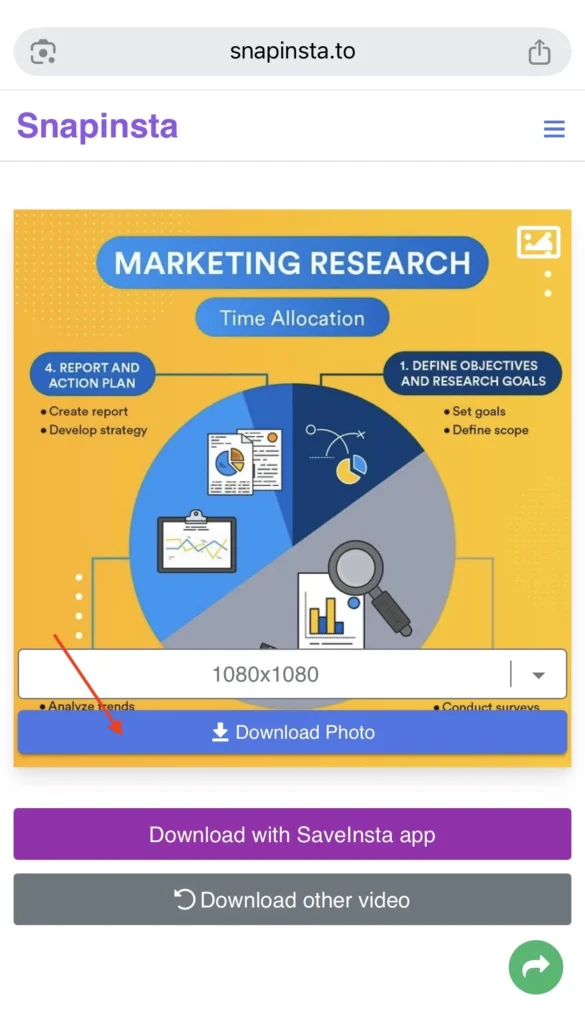
5. Open Instagram, tap the (+) Create icon, and upload the file. To maintain ethical creator standards, copy the original caption into your description and tag the original creator explicitly.
![]()

Option B: The “Never-Breaks” Creator Method (Capture + Mobile Editor)
When third-party tools fail entirely, social media managers rely on native device captures and mobile editing suites like CapCut or InShot. Because this method doesn’t rely on extracting Instagram’s raw source code, it is completely future-proof.
- Capture the Asset: If it’s a static photo or carousel, take a high-quality screenshot. If it’s a Reel or video, open your phone’s control center and use the native Screen Recorder to record the video playing through entirely.
- Clean It Up: Open a mobile editor like InShot or CapCut. Import your screenshot or screen recording.
- Crop & Trim: Use the crop tool to remove the Instagram UI elements (like the status bar, battery icon, or comment buttons). If it’s a video, trim the beginning and end so only the original content remains.
- Export and Upload: Export the clean file to your camera roll in high definition (1080p). Upload it directly to your feed as a new post, making sure to credit and tag the original source handle in your caption.
Method 4: The Manual Capture & Crop Method
When working with static graphics or memorable memes, you can always rely on a manual screen capture.
Step 1: Capture the Screen
- On Modern iOS Devices: Press the Side Button and the Volume Up button simultaneously.
• On Modern Android Devices: Press the Power and Volume Down buttons simultaneously.
• For Reels or Videos: Swipe down your device’s access menu and toggle on your native Screen Recorder before playing the asset in full-screen mode.
Step 2: Crop and Refine
Open the captured file within your device’s native photo library. Use the editing tools to tightly crop out the battery life indicator, device notches, and Instagram UI borders until only the core creative media remains.
Step 3: Upload, Tag, and Credit
Open Instagram, click the (+) Create icon, and select the polished image or video clip. In the caption block, write your message and include a mandatory, visible attribution line (e.g., “📸 Credit: @username”).

Troubleshooting: Why Can’t I Repost on Instagram?
If you find yourself missing the native repost button or unable to share an asset to your Stories, it is likely due to one of the following platform restrictions:
- The Source Account is Private: If an individual or brand operates a private profile, their content cannot be shared natively outside of their approved follower network. The share options will be completely hidden.
- Resharing Permissions are Disabled: Instagram gives users explicit control over their privacy. If the creator has gone to Settings > Sharing and Remixes and toggled off “Allow others to reshare your posts,” you will not be able to amplify their content natively.
- You are Attempting to Cross-Post Branded Content: Posts featuring specific commercial partnership tags or copyrighted music regional tags often have hard localized limits that block native duplication tools.
- Outdated App Architecture: If your interface looks different or lacks the native loop button, clear your app cache and head to the Apple App Store or Google Play Store to install the latest build update.
Instagram Repost FAQs
Is reposting legal on Instagram?
Reposting is legal as long as you give credit to the original creator of the post. This is why when you repost to your Instagram Story, Instagram adds the account’s username automatically. While some third-party tools do add the username, you should always double-check to ensure that you’re not breaking copyright laws.
Do I need permission to repost an Instagram Story?
According to Instagram’s Terms of Use, “you can’t post private or confidential information or do anything that violates someone else’s rights, including intellectual property.”
This means that it’s a good idea to ask permission before reposting someone’s Story. To be extra safe, keep a record of their response if it’s okay with them.
Can I see who reposted my Instagram Story?
If you tag another account in your Instagram Story and they repost it, you’ll get a direct message notifying you that they’ve done so. You can even choose to add this post to your story if they’ve added anything significant to it.
However, if someone reposted your Instagram Story by screenshotting it, you won’t get a notification that they did so unless they tagged you in their Story.
Why Should You Repost On Instagram?
Creating high-quality content consistently can be tough, especially if you’re trying to post 2-3 times a week as is generally recommended.
This means having a backlog of good content is vital.
Additionally, the importance of user-generated content can’t be overlooked. 79% of people say user-generated content highly impacts their purchasing decisions.
Reposting user-generated content on Instagram is a great way to build brand trust among Instagram users by highlighting endorsements from your customers, employees, and brand loyalists.

Wrapping Up
As you can see, all of the above methods make it easy to repost both photos and videos on Instagram.
Now that you know how to repost, you can start sharing content from your
friends, family, brands you support, and user-generated content from Instagram users that love your brand.
No matter which of the above methods you choose, it’s always best practice to credit the original creator in your captions.
Looking for a way to reshare content on Instagram that we missed? Do you share content using different methods or apps? Let me know in the comments.